

You might have heard about the Curly Girl Method online, especially with its resurgence on Tiktok.
If you’re new to this movement, it can be confusing to pick through all the rules, techniques, and wacky phrases to find where to begin. Should you scrunch or squish, diffuse or air dry, plop or pineapple, and what do pineapples even have to do with curly hair?
Well, you’re in luck as we’re going to give you the best guide we can, whether you’re a Curly Girl convert or cognoscente.
What is the Curly Girl Method?
The Curly Girl Method was invented by author Lorraine Massey. In short, it removes any haircare steps that prevent curls, waves, and coils from forming and lasting. This gentle and moisturizing process promotes curl patterns, prevents frizz, and keeps those curls from unfurling throughout the day.
How do I know if I have curly hair?
Some people might have curly or wavy locks without even realizing it. If your hair “poofs” up after brushing, frizzes after drying, pops up with random volume, or decides where to part all on its own (despite your best efforts), you might have curly hair. The Curly Girl Method is a hair-healthy process, so if you’re still not convinced, rest assured that trying any step won’t damage your ‘do.
The basics
Don’t let the copious amounts of information on the Curly Girl Method overwhelm you. We’re going to get into the bare basics for starting a curly girl routine, but before we even do that, let’s go over why this method works.
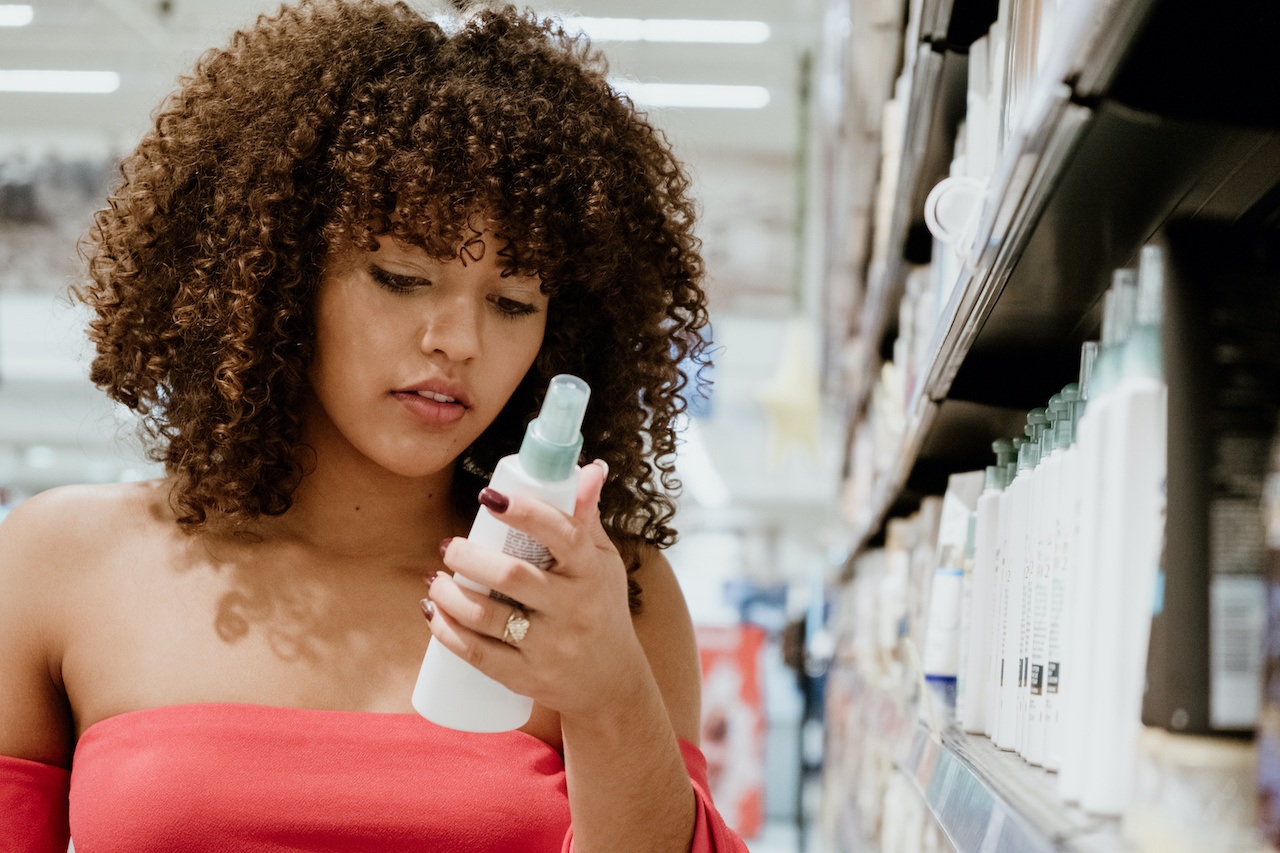
Curls get weighed down and lose their bounce and formation when the wrong ingredients are used. Hair products, especially shampoos, that use ingredients like sulfates, silicones, alcohol, mineral oil, and fragrance dehydrate or pull out curls and waves, which prevents them from looking, feeling, and doing their best. When in doubt, check your ingredients using online resources, look up individual products to see if they’re Curly Girl Approved, or browse lists of approved products from trustworthy sites.
Curl crimes can also occur outside the shower. For example, drying tresses with terry cloth towels makes curly hair frizz easily, and high-heat styling tools also dehydrate locks and cause frizz. Brushing hair when it’s dry, especially with boar bristle brushes, disrupts the curl structure and leads to not only frizz but also that dreaded “poof” effect.
The routine
If you’re curious and want to try the Curly Girl Method for the first time, you’re in luck! We’ve condensed all the information you need into a perfect quick-start guide for beginners.
Step 1: Reset
This is the most important step for new curly girls and guys! The reset wash removes all the product buildup of non-water-soluble silicones and waxes so your curls can form freely. For this step, you’re going to use a shampoo that does have sulfates but does not use silicones; this is very important.
For this step, we like to use Bumble and bumble’s Bb. Sunday Shampoo, Ouidad’s Water Works Clarifying Shampoo, or Ouai’s Detox Shampoo.
[elementor-template id=”2200132″]
After you’ve done this step once, you don’t have to do it again (unless you want to). As you’re transitioning to the curly girl method, it’s okay to use this reset wash once a week or so, and then once every few months whenever there’s noticeable buildup. It’s important to not use this shampoo every time you shower because it strips the water-insoluble ingredients out of your hair as well as natural oils, which leaves locks dry and frizzy when overused.
Step 2: Co-Wash
The very first time you start the Curly Girl Method, skip this step. But for every other shower, start here instead.
Co-wash is short for “conditioner-only washing:” That’s right! Instead of shampoo, you’re going to use a conditioner to wash your hair. If you’re like me, your mom told you all the time to avoid getting conditioner near your roots because it’ll make your hair too greasy. Well, we’re going to throw that sentiment out the window!
Curls need hydration, and this method will still clean your hair and scalp without stripping away the moisture your curls crave.
Start your shower with a sulfate, silicone, and alcohol-free conditioner, using it just like you would with a shampoo. We like Aussie’s Miracle Moist Conditioner and 3 Minute Miracle, Aveda’s Rosemary Mint Weightless Conditioner, and SheaMoisture’s Coconut & Hibiscus Curl & Shine Conditioner, Jamaican Black Castor Oil Conditioner, and Raw Shea Butter Restorative Conditioner. Massage the conditioner into your roots, wash it, rub and scrub to remove all the dirt and product buildup, and then rinse your hair thoroughly.
[elementor-template id=”2200133″]
If you absolutely cannot walk away from shampoo, using a “low poo” during your transition period is also okay. These are sulfate-free shampoos like Redken’s Curvaceous Low Foam Moisturizing Cleanser For All Curl Types (the large or small), Alfaparf Milano’s Semi Di Lino Calming Micellar Low Shampoo, or SheaMoisture’s Raw Shea Butter Moisture Retention Shampoo.
[elementor-template id=”2200136″]
Step 3: Condition
Yep, time for more conditioner! Curls need a lot of hydration, and adding more conditioner won’t make you a walking greaseball (we promise).
This can be the same conditioner you used in the second step, or a new conditioner altogether. In general, though, you’re going to want to look for a conditioner that has no sulfates, silicones, or alcohols. Along with the recommendations in Step 2, we also like Burt’s Bees’ More Moisture Conditioner, Burt’s Bees’ Very Volumizing Conditioner, and Living Proof’s No Frizz Conditioner.
[elementor-template id=”2200143″]
Take a handful (yes, a handful) of this conditioner (for shoulder-length locks) and use a wide-toothed comb, Tangle Teezer, or Wet Brush to remove any knots or tangles. Start at the ends and work your way up, adding more conditioner as needed to prevent pulling (you’re going to use a lot of conditioner here). Then rinse out most, but not all, of the conditioner.
Alternatively, you can try using the Squish to Condish method. This technique distributes conditioner from the ends of the hair to the middle while still encouraging better curl patterns and formation by letting the curls “clump.”
For this method, apply a generous amount of conditioner to your locks (while avoiding getting too close to your roots – just an inch or two away is fine) until they’re completely saturated.
Then you can try one of two techniques: Either gather water in your hands and dip your tresses into it while gently squishing, or rinse your hair slightly, gather the water and conditioner into your cupped hands as it starts to run, and squish up that way (just make sure you don’t rinse out all the product). As you squeeze your hair, it’ll make a squelching sound. If it doesn’t, add more conditioner.
Keep squishing your locks to promote curls until they’re no longer dripping. After using any styling products you like (Step 4), use a microfiber towel or a cotton t-shirt to scrunch your hair and remove any excess water.
Step 3.5: Methods
Like with the Squish to Condish method, there are a lot of unique tricks curly girls can use to create their best, bounciest curls. If your tresses aren’t cooperating even with everything else, try using some of these methods for better curl formation. The most common techniques are the Rake & Shake, Praying Hands, and Clumping.
For the rake and shake, use your fingers (or a wide-tooth comb) to “rake” through your hair, rather than using a brush, and distribute any styling products, then “shake” your hair in sections up to the root. This tends to create looser curls and waves, so not all Curly Girls love to use it, but it’s always worth a try.
Since brushing and combing can disrupt curl patterns, the alternative method is using “praying hands.” This is where you put styling products between two hands and gently glide them over your locks, root to tip, from the outside and underneath at the same time. Then, scrunch up your locks to make sure the curls are forming and clumping.
If you still have small, stringy curls and waves, you can also manually clump your locks to get those bigger, bouncier curls. When your hair is still wet, squeeze sections of your hair together with your hands. If your hair is dry, wet it (without washing out any products!) and scrunch it again to create clumps.
Step 4: Style
Just like with your conditioner, you want to use styling products free from sulfates, silicones, and alcohols.
The most common curl saver Curly Girls recommend is gel. Gel seals curls in a cast to maintain their shape while drying. You can apply the gel (and you’ll want to use a lot of gel here) using either the praying hands or rake & shake techniques.
There are a lot of great gels for curly hair, but some of the products we like to use include Amika’s Curl Corps – Enhancing Gel, Biosilk’s Rock Hard Gelee, Ouidad’s Advanced Climate Control Heat And Humidity Gel, and Joico’s Joigel Firm Styling Gel Hold 08.
[elementor-template id=”2200145″]
Once your hair is dry, Scrunch Out The Crunch to reveal the soft spirals below (scrunch out the gel with a light oil or jelly to tame frizz, if needed). For a lighter hold, we also like mousses and creams like Amika’s Plus Size – Perfect Body Mousse, SheaMoisture’s Coconut & Hibiscus Curling Gel Souffle, or Not Your Mother’s Curl Talk Defining Cream.
[elementor-template id=”2200147″]
If you’ve seen any Curly Girl content before, you’ve probably come across the term “plopping.” This is where you “plop” your wet hair into a microfiber towel, t-shirt, or turban (like Spa Savvy’s Microfiber Twist Hair Turban or Revele’s Microfiber Turban & Detangling Brush Set) to create the best curls (just remember to avoid terry cloth!).
[elementor-template id=”2200149″]
Place the cloth on a chair or bed, bend at the waist, and place your curls right into the center at the top of your head. Take the farthest part of the cloth and flip it over your hair to your neck, then tie the sleeves or extra fabric back behind your head. Tuck in any loose strands and you’re done.
With the curls pressed together in this wrap, they can’t be pulled out by gravity, and they dry faster (with less frizz) than air drying alone. Some leave their hair like this for 10-30 minutes while others sleep in it.
If air drying isn’t for you, you can still dry your hair using a hairdryer. You don’t want to blow out your curls, damage their hydration, or cause frizz, so the trick is to use a diffuser attachment and keep the dryer on a low heat setting.
Some people diffuse their curly hair until it’s dry while others use a diffuser before or after plopping, or in combination with other styling methods. We recommend never using a diffuser to fully dry your hair; let it air dry when it’s still at least 20% damp.
When diffusing, tilt your head to one side and place large sections of your hair over the attachment. Bring the diffuser up toward your scalp and hold it for 10-20 seconds before moving to another section. Avoid using your hands while diffusing as much as possible because this can also lead to frizz.
After your hair is styled and dry, make sure to protect and preserve your curls while you sleep. This is where the Pineapple trick comes in.
“Pineapple” hair is similar to a high bun or top knot, but a lot looser. Lean over, gather all your hair to the top of your head, then pull it through a ponytail holder once or twice in a very loose bun, as if you have a pineapple on top of your head. You can also try using a silk pillowcase or hair scarf at night to prevent frizz.
Common Problems
Once you’ve gotten your Curly Girl Method routine down, you still might come across some common issues people with curly hair face, even when they’re doing everything “right.”
First, check your hair’s porosity. This will show how easily your hair can retain moisture, which will affect how you’re going to help it. Low porosity hair has tight cuticles that don’t let in hydration, while high porosity hair has much looser fibers that take in, but don’t hold, water.
The easiest way to figure out your porosity is with a float test. Take a loose, clean strand of hair (without products on it) and place it in a glass of water. If it floats on top, it has low porosity, if it sinks right away it’s high, and if it floats and then slowly sinks, your hair has a medium (or “normal”) porosity.
If you have low-porosity hair, use protein-free and moisture-rich products. Also, using an oil (like avocado, jojoba, or argan) before washing helps prevent the strands from swelling and contracting too quickly, while also providing them with more hydration.
[elementor-template id=”2200154″]
Deep conditioning can help keep normal porosity hair in its best condition. It also helps to avoid protein-rich products in this routine.
Activities like swimming in chlorine and dying your hair can increase its porosity, so make sure to keep your tresses protected. Also, anti-humidity products (like Bumble and bumble’s Bb. Curl Anti-Humidity Gel-Oil, Oribe’s Impermeable Anti-Humidity Spray, or Living Proof’s No Frizz Nourishing Styling Cream) and leave-in conditioners (like Not Your Mother’s Blonde Moment Seal & Protect Leave-In Conditioner, SheaMoisture’s Red Palm Oil & Cocoa Butter Leave-In or Rinse Out Conditioner, or The Mane Choice’s The Alpha Soft As Can Be Revitalize & Refresh 3-In-1) help seal the hair’s cuticle.
[elementor-template id=”2200156″]
If your hair is overly greasy or oily, it could be that you’re still transitioning. Sulfates and other harsh cleansers strip your hair and scalp of natural oils, which is why curly hair needs to avoid these ingredients. As you transition to sulfate-free products, your scalp will continue to overproduce oil until it realizes it doesn’t need to anymore. This process can take at least a month for some, so give it more time before calling it quits.
On the other hand, if you’re curls are still limp, your hair might be over-moisturized. Try to cut back on the hydrating products and opt for stylers with more hold, like gels instead of mousses or creams.
If your hair is still very frizzy and dry, trying to add more moisture, just like if you have abnormal porosity. Deep conditioning treatments (such as Matrix’s Biolage HydraSource Conditioning Balm or Mixed Chicks’ Deep Conditioner) and hair masks (like SheaMoisture’s Manuka Honey & Mafura Oil Masque and Raw Shea Butter Masque) are great haircare additions, along with leave-in conditioners.
[elementor-template id=”2200164″]
It can take a lot of trial and error to find the best products and methods for your specific curls, but it’s so satisfying to have hair that behaves. Whether you’re plopping or pineappling, squishing or scrunching, make sure to check out our other articles for more Curly Girl tips, tricks, and tests.
For questions, concerns, or article ideas, feel free to reach out to our eCosmetics Beauty Editor directly at beauty@ecosmetics.com


